Make sure that nobody is modifying the camera settings, either
on the camera itself or through the camera manufacturer's web page.
What you should know
Depending on your account type,
you might be limited to the number of cameras that you can add. If you receive a message
to that effect, contact the Stratocast™ sales team for more
information.
Procedure
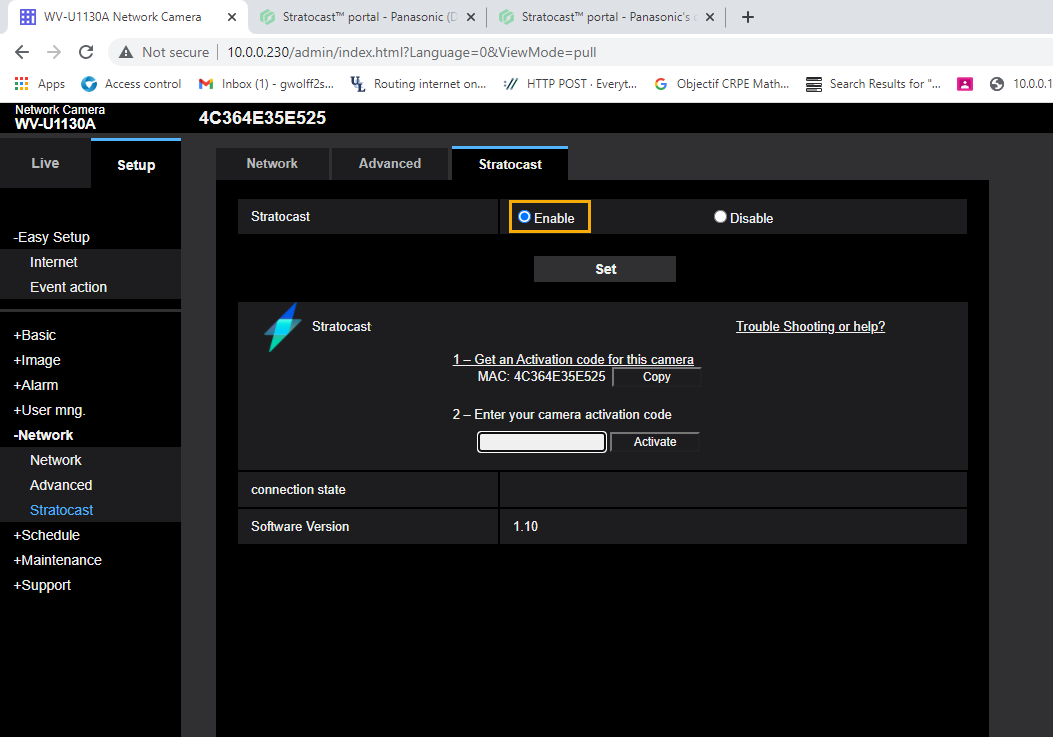
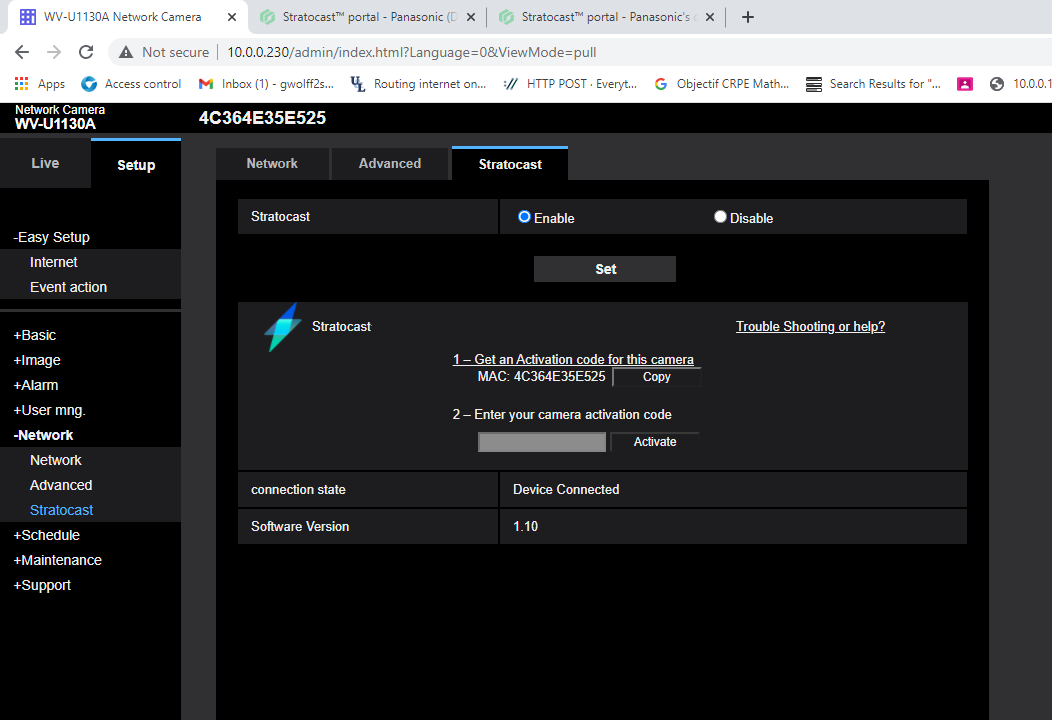
Login to the camera's web page using the administrator user ID and password.
In the Setup
> Network
> Stratocast page, select the Stratocast Enable radio
button.
Log on to Stratocast™ using your integrator
credentials.
From the Client Accounts page, click in the Number of
devices column.
Click Enroll a device and select the type of device. Enter the
following and then click Next:
Name
The name of your device, as identified on the customer’s
Devices page. If there are many devices, enter a name that is
easy to recognize and find.
Time zone
The time zone that the video unit is installed in.
Manufacturer
The device manufacturer.
Tip: Make sure you select the iPRO manufacturer.
Note: If your required manufacturer is not displayed in the drop-down list, contact
Stratocast support.
In the Authenticate video unit window, enter the camera's MAC
address, then click Next.
Tip: You can retrieve the MAC address information from the Panasonic
EasySetup discovery tool, from the sticker on
the camera box, or from the sticker located on the camera.
Wait a few minutes for
Stratocast to create an activation code.
Copy the activation code.
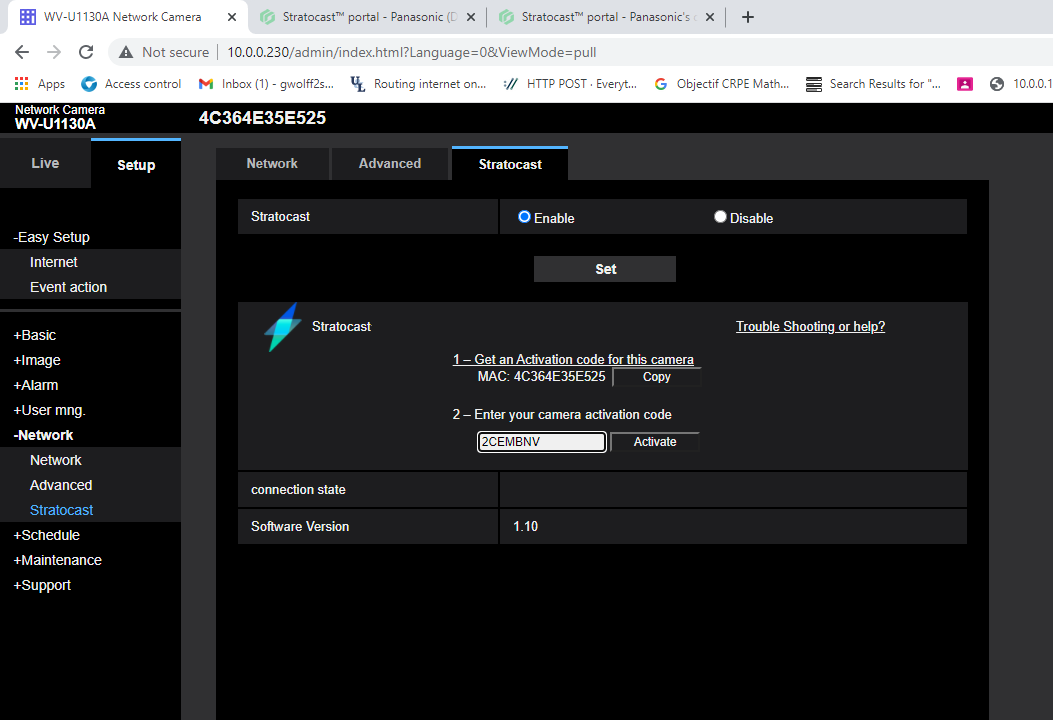
In a Web browser, return to the camera's registration page, paste the activation code
into the Activation code field, and click
Activation.
Tip: You can reopen the page using the URL https://<IP
Address>/Stratocast. Note that the URL is case-sensitive.
When the status changes from Activation started to
Device connected, the enrollment process is complete.After the camera has connected to Stratocast, the Enroll a device window is displayed.
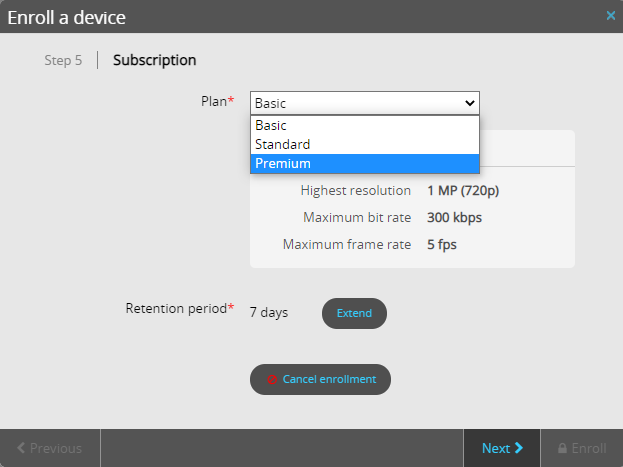
Choose a subscription plan and click Next.
You can choose any of the 3 plans listed.
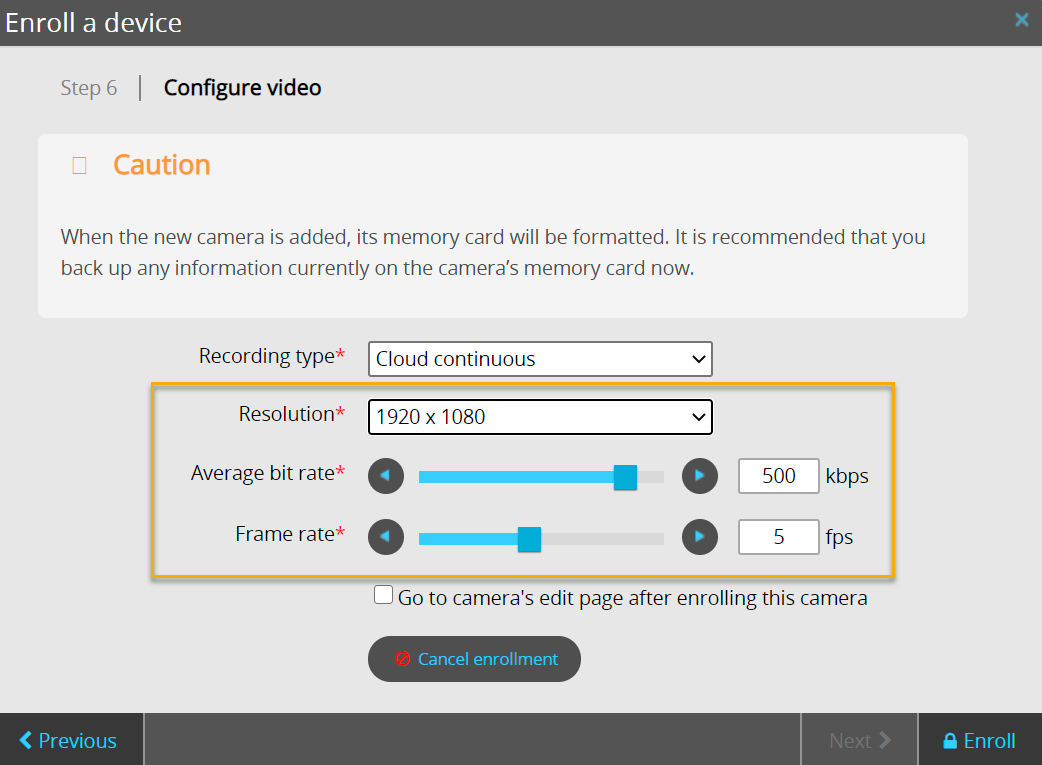
Configure the resolution, frame rate, and bit rate.
Tip: If you are unsure which settings to use, choose the maximum available
for each setting.
 Note: If your required manufacturer is not displayed in the drop-down list, contact Stratocast support.
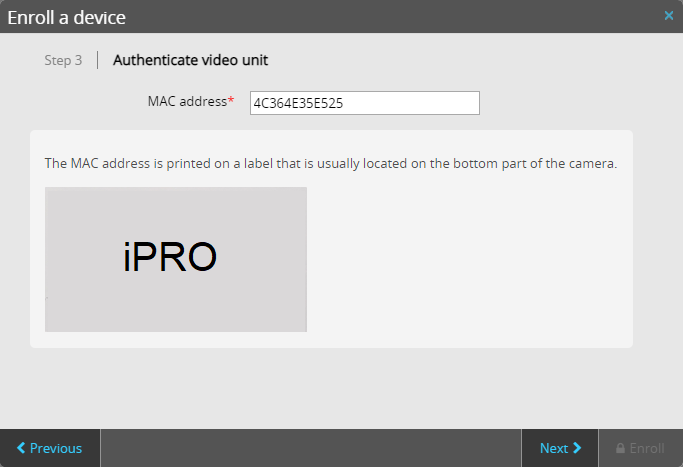 Tip: You can retrieve the MAC address information from the Panasonic EasySetup discovery tool, from the sticker on the camera box, or from the sticker located on the camera.Wait a few minutes for Stratocast to create an activation code.
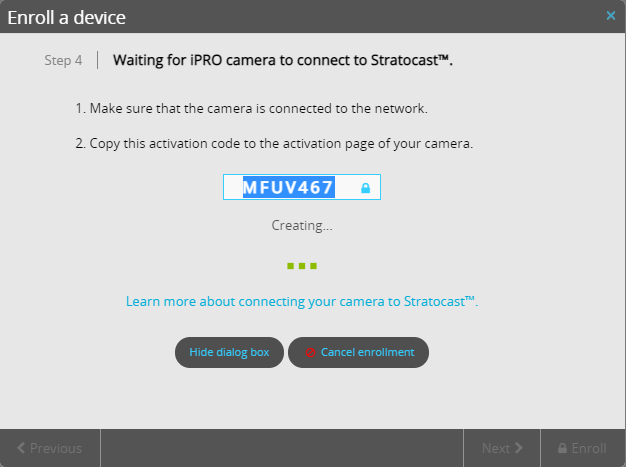
 Tip: If you are unsure which settings to use, choose the maximum available for each setting.